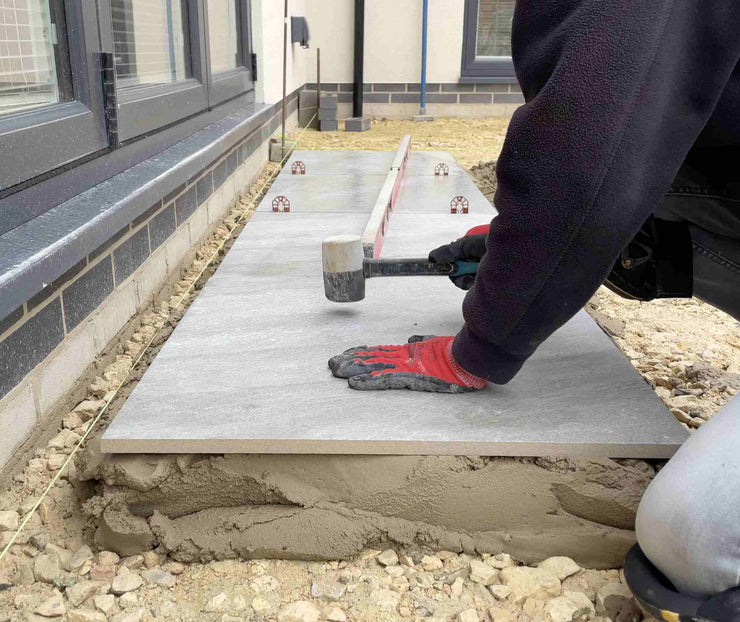
How to lay porcelain slabs - a step-by-step guide
If you do decide to lay your porcelain slabs, there are a number of steps that you’ll need to follow. The instructions detailed below will help you lay porcelain paving slabs correctly, so be sure to take time to read through them all in full before getting started.
1 - Prepare your base
The first step is to prepare your base. This step is essential and cannot be skipped, as it ensures your porcelain paving slabs are securely supported for years to come. Without a proper base, your paved patio area could become unstable and potentially unsafe.
Begin by marking out your chosen area using wooden pegs. Remove all vegetation, roots, and topsoil within the marked space to a depth of at least 200mm.
Set your gradient to a 1 in 80 fall with a spirit level. This will ensure proper drainage towards designated drainage points.
Rake the surface thoroughly and compact the entire area using a roller or a wacker plate.
2 - Lay a sub-base
You should then lay a sub-base to create a firm and level foundation. A solid base helps to reduce the risk of movement beneath the finished surface, which is a common cause of cracking over time.
Generally, a sub-base should be 100mm deep for patios and 200mm deep for driveways. However, it’s important to consider the type and frequency of loads, as well as the ground conditions. As a rule of thumb, surfaces that need to handle heavier loads should have deeper sub-bases to ensure durability and stability.

3 - Lay your full base
A full bed of workable mix mortar with a 4:1 sharp sand to cement ratio should be laid and worked with while semi-wet. Based on the product recommendations, aim for a thickness of 15mm to 30mm. At this stage, it’s important to ensure the base is level by using a spirit level.
TIP: Instead of laying all the mortar at once, work one slab at a time. This approach prevents the mortar from drying out before you get to it and allows you to complete the task at a comfortable and manageable pace.

4 - Prime your slabs
Because porcelain paving is non-porous, it’s important to use an adhesive to ensure each porcelain tile bonds securely to the base. Porjoint Porcelain Primer is an excellent choice for achieving a strong bond between the tile and the mortar bed.
Using it is straightforward: simply brush the back of the paving slab with the primer, then place the primed side down onto the mortar bed.
TIP: For the best results, apply the primer to one slab at a time to prevent it from drying out and losing its adhesive properties.
5 - Lay the slabs in position
You can now begin placing the primed porcelain pavers into position.
Using a rubber mallet, gently tap each porcelain tile into place, ensuring they are securely bedded into the mortar base. The entire surface of the paver must make full contact with the mortar, as this will create a strong bond and ensure the tiles have a long-lasting finish.
Be sure to use a rubber mallet rather than a metal hammer for this step. A metal hammer could cause the slabs to crack or chip if struck with excessive force.
6 - Use spacers to ensure uniformity
You will be able to use spacers between the porcelain pavers to help you keep a uniform distance between each one. A gap of around 5mm for joints should be left when doing this.
7 - Check the levels
Once all the slabs are in position, you should ensure that each porcelain tile is level both with the ground beneath and with one another. Slabs at different levels could become a trip hazard, so it’s important to do this step properly.
After you have checked this, you can clean off any residual primer on the surface of the pavers.
8 - Add jointing compound
Now it’s time to fill the 5mm gaps between each porcelain slab with the jointing compound. This creates a smooth surface, helps to keep the slabs firmly bedded in place and prevents moss and weeds from growing in between the pavers over time. Once this is done, brush any excess away.
9 - Let it dry
Leave the area to dry for at least 24 hours with no one walking on the newly-laid slabs. If wet weather is forecasted, you’ll need to protect the area with tarpaulin or other waterproof material to prevent any rainwater from seeping through the joins and into the mortar beneath.